I’ve helped enough people through renovations to know the exact moment panic sets in.
It’s usually right after you get excited about changing your space. Then reality hits: the budget questions, the contractor search, the what-if-we-mess-this-up fears.
You want your house to feel like home. But the path from here to there looks like chaos.
Here’s what I know works. Break it down into steps you can actually handle. One decision at a time.
This house renovation guide heartomenal walks you through the entire process. From that first idea you scribbled on a napkin to the day you step back and think “yes, this is exactly right.”
I’ve guided homeowners through dozens of transformations in Laramie and beyond. The ones that go smoothly all follow the same framework. Plan the practical stuff first, then layer in the beauty.
You’ll get a clear roadmap that covers budgeting, planning, design choices, and execution. No overwhelm. No guessing what comes next.
This isn’t about perfect magazine spreads. It’s about creating a space that works for how you actually live.
Let’s turn that overwhelming project into something manageable.
Phase 1: Laying the Foundation – Vision and Budget
Here’s what nobody tells you about starting a renovation.
The planning phase feels boring. You want to pick out tile and paint colors. You want to see progress. But skipping this step? That’s how you end up three months in with a half-finished kitchen and no money left.
I’ve seen it happen too many times.
Define Your ‘Why’
Start with the real problem you’re trying to solve. Not what HGTV told you to want. What actually bugs you about your space right now.
Is your kitchen too small to cook a real meal? Does your bathroom feel like a cave? Are you tripping over stuff because you don’t have enough storage?
Write it down. Because when you’re standing in the tile store looking at 47 shades of white, you’ll need to remember what you’re actually fixing.
The inspiration part comes next. I’m a big fan of mood boards, though I’ll be honest, mine usually start as a mess. I use Pinterest because it’s easy, but a physical board works just as well if you’re into that.
What matters is creating something you can look at and say “yes, that’s the vibe.”
Now here’s where I get opinionated. Most people skip the hard part, which is separating must-haves from nice-to-haves. They treat everything like it’s essential. Then they wonder why their house renovation guide heartomenal budget exploded.
Your must-haves are things that solve your core problems. Everything else goes in the nice-to-have column. And some of those nice-to-haves? They’ll stay wishes. That’s fine.
When it comes to budget, add 15-20% on top of what you think you’ll spend. I know that sounds excessive. But walls hide surprises. Permits cost more than you expect. Delivery gets delayed and you need to pay your contractor to come back.
Research what things actually cost in your area too. Not national averages. What they cost in Laramie or wherever you live.
This foundation work isn’t glamorous. But it’s what separates projects that finish from projects that stall out halfway through.
Phase 2: Assembling Your Dream Team
You’ve got your plan. You know what you want to change.
Now comes the part that trips up most people. Finding the right help.
I’m not going to tell you to hire out everything. That’s expensive and honestly, some tasks are pretty simple if you take your time. But I’m also not going to pretend you can do it all yourself (unless you actually have the skills and time).
Here’s what I recommend.
Handle the small stuff yourself. Painting, basic landscaping, installing new hardware on cabinets. These don’t require licenses and you can find good tutorials online. Plus you’ll save a decent chunk of money.
But when it comes to electrical, plumbing, or structural changes? Call a pro. Not just because it’s safer. Because one mistake can cost you way more than you’d save doing it yourself.
Finding someone good isn’t complicated.
Start with referrals from friends who’ve actually done renovations. Check local associations like the National Association of Home Builders for licensed contractors in your area. Look at reviews but read between the lines (one bad review among fifty good ones probably isn’t a dealbreaker).
When you meet with potential contractors, ask about their license and insurance. Ask for references from jobs they finished in the last year. And watch for red flags like requiring full payment upfront or being vague about timelines.
Get at least three quotes.
Make sure they’re itemized so you can actually compare what you’re getting. A quote that just says “kitchen remodel $30,000” tells you nothing. You want to see materials, labor, timeline, and what happens if something unexpected comes up.
The house renovation guide heartomenal approach is about making smart choices that fit your budget and skill level. Some people at heartomenal have done full renovations with minimal help. Others bring in pros for almost everything.
Neither way is wrong. It just depends on what works for you.
Phase 3: The Design and Selection Process
This is where your renovation starts to feel real.
You’ve got your budget sorted and your contractor lined up. Now comes the fun part. And honestly, the part where most people second-guess themselves about a hundred times.
I’m not going to sugarcoat it. Design decisions stick with you for years. Pick the wrong tile and you’ll cringe every time you walk into that bathroom.
But here’s what I’ve learned after working through more renovations than I can count.
Start with the floor plan.
Most people jump straight to paint colors and cabinet styles. Big mistake. Your layout determines how you’ll actually live in the space.
I once moved a doorway by three feet in a kitchen remodel. That small shift opened up room for an island and completely changed how the family used the space. Sometimes it’s not about adding square footage. It’s about using what you have better.
Walk through your current space and notice where you bump into things. Where do you wish you had more counter space? Where does traffic flow feel awkward?
Those observations matter more than any design magazine spread.
Materials come next.
You want something that looks good but won’t fall apart in five years. I get it. The budget’s tight and those cheap tiles look almost as nice as the expensive ones.
Here’s my take. Splurge on the stuff you touch every day. Countertops and flooring take a beating. Go mid-range on things like backsplash tile where durability matters less.
For flooring, I’m partial to luxury vinyl plank in high-traffic areas. It looks like hardwood but stands up to water and scratches way better. (Your future self will thank you when someone spills a glass of wine.)
Countertops? Quartz beats granite for most people. Less maintenance and more color options.
Color schemes tie everything together.
Pick three colors max. One main color, one accent, and one neutral. That’s it.
I see people try to incorporate every shade they love and the space ends up feeling chaotic. Your eye needs somewhere to rest.
Test paint samples on the actual walls. Not those tiny cards from the store. Buy the sample pots and paint two-foot squares. Live with them for a few days in different lighting.
What looks perfect at noon might feel completely wrong at 7pm when you’re making dinner.
Lighting makes or breaks the whole thing.
You need three types. Ambient lighting for overall brightness. Task lighting for specific work areas. Accent lighting to highlight features you want to show off.
Most builders throw in basic overhead lights and call it done. That’s not enough.
In kitchens, I always add under-cabinet lights for prep work. In bathrooms, sconces on either side of the mirror beat a single overhead fixture every time. (Nobody looks good in harsh overhead lighting.)
Dimmer switches cost maybe twenty bucks more per room. Best money you’ll spend. Being able to adjust brightness changes the whole mood of a space.
Want more guidance on pulling all this together? Check out these home tips and tricks heartomenal for extra help.
The design phase takes time. Don’t rush it. These choices shape how you’ll feel in your home for years to come.
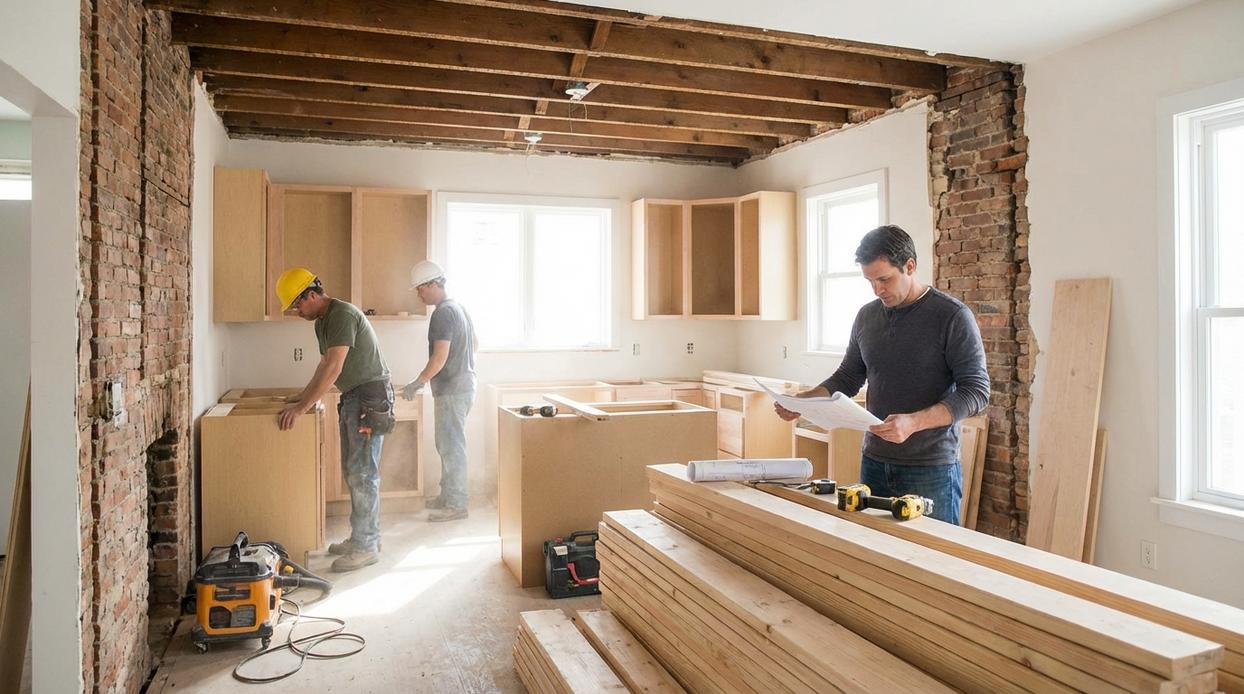
Phase 4: Navigating the Construction Zone
You’re about to live in a war zone.
Not literally. But when demolition starts, it’ll feel pretty close.
I won’t sugarcoat it. This phase tests your patience. Dust gets everywhere (and I mean everywhere). The noise starts early. Your morning coffee routine gets disrupted.
But here’s what makes it bearable.
Preparing for Disruption
Set up a temporary kitchen before demo day. I’m talking mini fridge, microwave, and a coffee maker in another room. You’ll thank yourself when you can’t access your real kitchen for three weeks.
Seal off the construction area with plastic sheeting. Tape it well. Dust is sneaky and will find every gap.
Move anything you care about to a different floor or room. That includes furniture, photos, and anything you don’t want covered in drywall dust.
Understanding the Timeline
Demo comes first. It’s loud and fast (usually one to three days).
Then rough-in work starts. Plumbers and electricians run new lines behind the walls. This takes longer than you’d think because inspections happen at each stage.
Drywall goes up next. Then comes mudding, sanding, and more sanding. This is when dust reaches peak levels.
Finally, finishing work. Cabinets, countertops, flooring, paint.
The whole sequence? Plan for six to twelve weeks depending on your project size. Check out this house renovation guide heartomenal for more detailed timelines.
Communication is Key
Talk to your contractor every few days. Not to micromanage but to stay informed.
Ask about the schedule for the coming week. What trades are showing up? When do inspections happen?
When surprises pop up (they will), discuss options right away. Waiting just adds delays.
Handling Change Orders
A change order is a formal document that changes your original contract. Maybe you found rotted subfloor during demo. Or you decided to upgrade that light fixture.
Get everything in writing. Every single change.
Ask for the cost breakdown before signing. Labor and materials should be listed separately.
The benefit? You stay in control of your budget even when plans shift.
Phase 5: The Final Touches and Styling
You’re almost there.
The construction dust has settled. The paint is dry. Your contractor is packing up their tools.
But here’s where a lot of people mess up.
They rush to the finish line and miss things. Little details that’ll bug you for years (trust me on this one).
The Punch List
This is your last chance to catch everything before you hand over final payment.
Walk through with a notepad. Check every corner. Does that cabinet door close right? Are the light switches all working? Any paint drips you missed?
Some people say you should just trust your contractor got it all. That being picky makes you difficult.
I disagree.
A good contractor wants you to be thorough. They’d rather fix a wobbly drawer pull now than get a call about it three weeks later.
Bringing in Personality
Now comes the part I actually enjoy.
You’ve got this beautiful blank canvas. Time to make it yours.
Here’s how I think about it. You can go two ways with styling:
Option A: Buy everything at once from one store. It’ll match perfectly. Look polished. Feel a bit like a showroom.
Option B: Layer things in slowly. Mix vintage finds with new pieces. Let the room develop over time.
Neither is wrong. But Option B usually feels more like home.
Start with the big stuff. Your sofa or bed frame. Then add textiles that bring warmth. A throw blanket. Some pillows that aren’t just beige.
Art comes next. And no, you don’t need expensive gallery pieces. I’ve seen rooms come alive with framed vintage maps or photos from your own trips.
The Big Reveal
Sure, take that after photo. You earned it.
But the real test? How the room feels on a random Tuesday night.
Can you actually use it? Does it make you happy when you walk in?
That’s what matters. Not the Instagram moment (though those are nice too).
For more ways to make your space work for you, check out these home tips heartomenal has put together.
Your renovation is done. Now you get to live in it.
Enjoying Your Beautifully Renovated Home
You now have a roadmap that takes the mystery out of renovation.
What felt overwhelming before doesn’t have to be. I’ve shown you that a structured approach turns chaos into something manageable and even rewarding.
The house renovation guide heartomenal walks you through each phase. Planning and budgeting come first. Then construction. Finally styling.
Each step builds on the last. You don’t need to figure it all out at once.
I’ve seen people transform their spaces by following this process. They start with a clear vision and work through it methodically.
The home you’ve been picturing is possible. You just need to break it down into pieces you can handle.
Here’s what to do right now: Start your mood board. Define your why. Ask yourself what you really want this space to feel like when you walk through the door.
That’s your foundation. Everything else follows from there.
Take the first step today. Your inspiring home is waiting on the other side of that decision. Homepage.